How to Set Up a Tattoo Machine Safely and Effectively. Step-by-Step Guide

Properly preparing a tattoo machine is one of the most important steps in any tattooing session. It ensures your tools operate smoothly, your workspace stays hygienic, and your client receives a clean, consistent result. For apprentices and professionals alike, machine setup isn’t just routine—it’s a vital skill that directly affects your speed, accuracy, and safety.
This guide outlines the core principles of tattoo machine preparation, breaking the process into clear, manageable stages. Whether you're working with a classic coil model, a rotary setup, or a modern pen-style machine, you’ll find tailored insights for each type—along with practical hygiene tips, needle handling guidance, and assembly techniques.
By understanding how each component works and how to configure it effectively, you’ll reduce the risk of errors, improve your workflow, and create a safer environment for both you and your clients.
Types of Tattoo Machines
Tattoo machines generally fall into three main categories: coil, rotary, and pen-style. While they all serve the same purpose—driving the needle—they differ in mechanics, setup, and handling. Understanding these differences helps you tailor your preparation and technique to the equipment you use. Each type suits different tattooing styles and comfort levels:
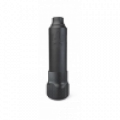
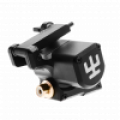
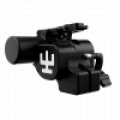
Pen Tattoo Machines
Pen-style machines are designed for simplicity and comfort. Shaped like a thick marker or stylus, they offer balanced weight and intuitive control—making them an excellent option for both experienced artists and apprentices. Needle depth is usually adjusted by rotating the grip, and most pen machines use pre-sterilized cartridges, reducing setup time and simplifying hygiene.
 Ultron Pen
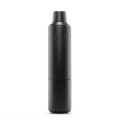 Ultron 2 Series 24
 Ultron 3 Series 22
 Custom Ultron 2 14
 Custom Ultron 3 19
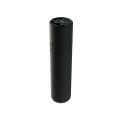
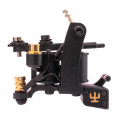
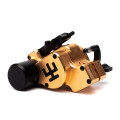
Coil Tattoo Machines
Coil machines use electromagnetic coils to move an armature bar up and down, driving the needle in a punch-like motion. These machines are known for their distinctive buzzing sound and strong hit, which can be fine-tuned for lining or shading. Coil setups require more manual adjustment, including spring tension, contact screw alignment, and voltage tuning. They’re ideal for artists who want maximum control over machine dynamics and don’t mind frequent retuning.
 Coil 27
 Packs Coil 14
Hybrid Tattoo Machines
hybrid systems, combining the ease of pen ergonomics with the performance features found in traditional rotary or coil machines.
One example is the Ultron 4 Pro by Vlad Blad—a high-performance pen that features adjustable stroke length, adaptive hit response, and a powerful direct-drive motor. These characteristics make it a versatile option for artists who frequently shift between lining, shading, and color packing within a single session.
By choosing the right type of machine for your workflow and preferences, you lay the groundwork for smoother sessions, better control, and more consistent results.
 Custom Ultron 4 Pro
 Custom Avenger 3 Pro27
 Avenger 2 Pro Series48
 Avenger 3 Pro Series35
 Custom Avenger 2 Pro37
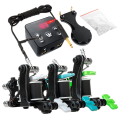
Initial Preparation
Before any needle touches skin, your setup environment must meet the highest standards of cleanliness and organization. This is the foundation of safe tattooing and efficient machine handling.
Hygiene and Workspace Setup
Start by disinfecting all surfaces that will come into contact with your equipment, including work tables, armrests, machine stands, and your power supply. Use medical-grade disinfectants and allow proper drying time before placing any tools.
Wash your hands thoroughly with antibacterial soap and put on a fresh pair of disposable nitrile or latex gloves. Change gloves immediately if they become contaminated. Use a face mask and protective sleeves for cables to reduce cross-contamination risks.
Preparing Disposable and Sterile Components
Lay out all essential equipment in a designated sterile zone, away from non-sanitized objects. Ensure that all single-use items—needles, cartridges, grip covers, and machine bags—are sealed and undamaged prior to opening. If you’re using reusable grips or tubes, confirm that they’ve been autoclaved and stored properly.
Your basic setup should include:
- A tattoo machine (coil, rotary, or pen)
- Sterile needle or cartridge (based on the machine type)
- Disposable or sterilized grip
- Power supply and foot pedal
- Clip cord or RCA cable
- Machine bag, clip cord cover, and barrier film
- Rubber bands and grommets (for coil machines)
Organizing these tools in advance not only streamlines your setup but also helps prevent mistakes that can disrupt the session or compromise client safety.
Component Preparation
Once your workspace is clean and tools are arranged, it’s time to begin assembling your tattoo machine with care and precision. Each part must be connected securely and in the correct order to ensure consistent performance during your session.
Grip and Needle Setup
If you're using a coil machine, insert the sterile needle into the tube so that the tip aligns evenly with the opening. Attach the needle loop to the armature bar using a rubber grommet, ensuring it sits firmly but without tension pulling it off-center. Rotate the loop so the eye faces left—this helps maintain proper needle alignment during operation.
Secure the tube and grip into the machine’s vise. Adjust the position so the needle extends approximately 1.5 to 2 millimeters beyond the tip when at rest. This depth is typically ideal for steady pigment flow without excessive trauma to the skin.
For rotary and pen-style machines, insert the cartridge into the grip until it locks with a click. Some devices allow for needle depth adjustment by twisting the grip—do this before powering the unit to avoid accidental overexposure.
Cable and Barrier Setup
Connect the appropriate cable—clip cord for coil machines or RCA for rotary and pen machines. Cover all cables and grips with disposable protective sleeves to prevent contamination during tattooing. Secure film wrap around exposed sections using cohesive grip tape to ensure nothing shifts mid-session.
Careful assembly and barrier placement not only support better control and hygiene but also reflect professional discipline in your workflow.
Needle Installation and Positioning
Correctly installing and aligning the needle is essential to ensure smooth movement, accurate lines, and safe skin penetration. Improper setup can lead to ink blowouts, inconsistent strokes, or even client injury.
Inserting the Needle or Cartridge
For coil machines, once the needle is connected to the armature bar, gently move the bar up and down to confirm free, even motion. The needle should glide through the tube without friction or wobble. Too much resistance or lateral play indicates poor alignment or incorrect grip positioning.
With rotary and pen-style machines, insert the cartridge straight into the grip or designated port until it locks securely. Never force the cartridge—if it doesn’t seat properly, replace it with a new one to avoid malfunction during use.
Adjusting Needle Depth
Needle depth is a critical variable. A general guideline is to expose 1.5 to 2 mm of the needle tip from the end of the grip or cartridge housing when the machine is idle. Deeper settings increase the risk of skin trauma, while shallow exposure may prevent the ink from settling properly.
Pen machines and some rotary models allow for depth control via grip rotation. Test the needle movement after adjustment to make sure it fully retracts and extends with the machine’s cycle.
Final Checks
Once installed and adjusted, activate the machine briefly to observe the needle motion. It should move in a controlled, straight path without rattling or hesitating. Recheck your grip tightness and cartridge alignment if any irregular movement occurs.
This stage bridges mechanical setup with technical execution. Attention here helps avoid skin damage, uneven pigment flow, and mid-session corrections.
Machine Assembly
A well-assembled machine creates the stability and consistency you need to tattoo with confidence. Each component must be secured in the correct sequence to support clean motion and reliable power delivery.
Aligning and Securing the Build
For coil machines, ensure the armature bar, front spring, and contact screw are properly aligned. The front spring should sit flat, and the contact screw should meet the spring tip evenly when the machine is at rest. Misalignment here can affect stroke consistency and machine responsiveness.
Once the needle is attached and the grip is in place, tighten the tube vise screw just enough to hold it firmly—overtightening can cause warping or slippage under pressure. Test the needle’s movement again after final tightening.
In rotary and pen machines, assembly is often more straightforward. Connect the grip and motor body according to the manufacturer’s instructions. Many modern models feature a twist-lock mechanism or magnetic closure. Insert your cartridge after the body is fully assembled.
Final Placement and Ergonomics
Adjust the grip to your preferred angle and orientation. For coil machines, ensure the clip cord doesn’t pull or strain the rear connection point when the machine is held in a working position. For rotary and pen machines, confirm that the RCA cable or battery pack is balanced and not overextending the grip end.
Once assembled, your machine should feel solid, balanced, and responsive in the hand. Any looseness, shifting, or unplanned vibration could disrupt your control or introduce unnecessary strain over long sessions. Take this final opportunity to correct anything that feels off—your hand will thank you later.

Stability Enhancement
A stable machine setup is crucial for smooth needle motion and precision during linework or shading. Minor adjustments at this stage can significantly improve your control and reduce skin trauma.
For Coil Machines
Use rubber bands to stabilize the needle against the tube. Wrap one or two bands from the front of the machine over the needle bar and secure them behind the frame. This helps reduce lateral movement and vibration during operation.
The tension should be firm enough to guide the needle but not so tight that it impairs motion. If the needle skips or drags, reduce band tension or recheck your alignment. Proper spring response and stroke tuning also contribute to stability—especially when transitioning between lining and shading.
For Rotary and Pen Machines
Rotary and pen-style machines generally require less mechanical stabilization due to their direct-drive or enclosed motor design. However, grip position and cartridge seating still affect performance. Ensure the cartridge clicks fully into place, and confirm that the needle moves evenly throughout its cycle.
If your machine allows for stroke adjustment, choose a setting that matches the intended technique. Shorter strokes work well for soft shading and dotwork; longer strokes provide more impact for bold lines and color packing.
Optimizing Comfort and Control
Regardless of machine type, double-check that your grip is secure, your cable is unobtrusive, and your machine sits comfortably in your hand. Small ergonomic tweaks—like adjusting grip diameter or shifting cable position—can greatly reduce fatigue over longer sessions.
Machine stability isn’t just about performance; it’s about building consistency into every stroke you make. Invest a few extra minutes now to avoid adjustments mid-tattoo.
Final Preparation and Safety Measures
Before you begin tattooing, take a few final steps to confirm that your setup is sterile, stable, and fully functional. These checks are the last safeguard between preparation and practice—and they help ensure that your session starts smoothly and safely.
Barrier Wrapping
Wrap your machine with a disposable protective sleeve, including the grip and body. Use a clip cord or RCA cover for cables, sealing the open ends with tape or barrier film to prevent ink or bodily fluids from seeping in.
Cover the power supply and foot pedal with disposable film as well. Even if these components don't come into direct contact with the client, they can easily transmit contaminants if left unprotected.
System Check Before You Start
Before the client arrives or your stencil is applied, activate the machine and perform a full-function test:
- Confirm smooth and even needle movement
- Ensure the voltage level is appropriate for the task
- Check for unusual vibration, sound, or resistance
- Test your foot pedal response and stability of connections
- Re-verify needle depth and grip security
If anything feels off, pause and resolve the issue before proceeding. A two-minute adjustment now can prevent major problems later.
Hygiene Reinforcement
Replace gloves if you've touched any non-sterile surfaces during setup. Avoid making changes mid-session unless absolutely necessary—and always rewrap any part you adjust after tattooing begins.
Final preparation is as much about discipline as it is about equipment. It reinforces your focus and reassures your client that they’re in capable, professional hands.
Bringing It All Together
Setting up a tattoo machine isn’t just a mechanical process—it’s a reflection of your professionalism and attention to detail. From organizing a sterile workspace to assembling components and dialing in voltage, each step plays a role in delivering safe, clean, and consistent results.
Whether you’re using a traditional coil machine or a modern pen-style device, proper preparation enhances both your control and your confidence. It minimizes risks, streamlines your workflow, and allows you to focus fully on the creative process.
By refining your setup routine and staying mindful of hygiene, ergonomics, and performance, you not only improve the quality of your tattoos—you build trust with every client you work with.
Master the fundamentals. Respect your tools. And treat setup not as a chore, but as the foundation of great tattooing.
Leave a Comment